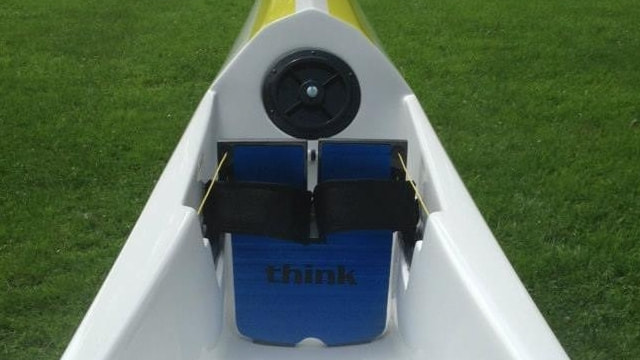
Surfski Beginner Guide - Surfski Anatomy2/10/2018 Surfski AnatomyAs the exciting discipline of Surfski continues to grow around the world I would like to help as many new paddlers get in to the sport as possible. If you are new to the sport, the craft specific jargon and massive variety of surfkis on the market can be off putting and daunting to get your head around. Below is a quick and simple guide to the main parts of all surfski craft from beginner to elite. This is a guide to help grow your knowledge and get started paddling and ultimately on the water having fun. *Of course reading blogs and watching videos is no substitute for professional coaching and instruction, please seek out professional training before hitting the water. From Left to Right. Stern- The tail end of the ski. Same terminology as used with boats Rudder Hatch- This is the housing for your rudder wheel and allows access for changing rudders. Back Deck- The whole area behind your seat facing the sky. Widest Point*- As it suggests, the widest part of the ski. This will be in direct relationship to the stability of the ski. i.e The wider the measurement, the more stable the ski. Bucket/Cockpit- This is where you sit. It should be comfortable! Bailer- The bailer drains water from the bucket and footwell as you paddle. Footwell- Where your feet contact the foot plate, pull strap and pedals. Also a good place to keep a water pack. Front Deck- The area forward of the footwell facing the sky. Bow- The front end of the ski. *As a rule of thumb when researching potential Surfskis the following width range is a good guide to its stability range. 52cm or more- Beginner 48cm -52cm- Improver 45cm-48cm - Intermediate 44cm or less- Advance/Elite The above picture show the footplate from the paddlers view.
You can clearly see - Pedals with cables for steering the rudder -Pull straps for added connection with your feet -Footplate for pushing against as you paddle *The footplate in all modern surfskis should be easily adjusted to suit a variety of paddler leg lengths. If you cannot comfortably reach the footplate you will not be able to realise the full potential of the ski and should look for a better fit. Find this post helpful? If you have any questions or suggestions for more posts please comment below and share your thoughts. I would be happy to help. David
1 Comment
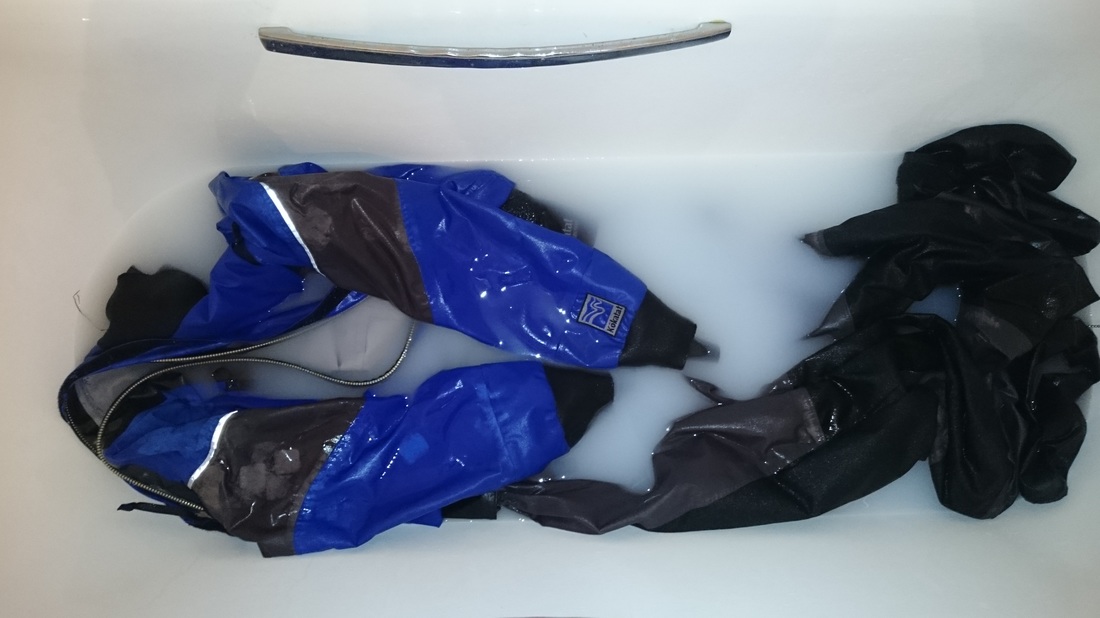
How to -Dry Suit Reproofing9/23/2015 Give your suit a new lease of life...Here is my quick step by step guide to reproofing Goretex Dry suits or Cags. When you get a new Dry suit or any outer shell garment for that matter, it will have a DWR coating on the fabric. This coating helps to repel water by beading it on the surface. With use over time this coating will wear off and the fabric will start to "wet out". It will still be waterproof but its performance and breath-ability will be greatly reduced. So it is necessary to give you kit some maintenance now and again, to keep it at its best.
I like to wash and reproof my dry suit about once every season depending on how much use it is getting. Below are the steps I take to get it back to life. *Note: This is the method I use and find effective. But please check with manufactures guidelines and instructions before treating your expensive garment! AuthorKayak instructor, athlete, business owner and outdoor enthusiast from the west coast of Ireland. Sponsors
Paddle & Pedal Blog HERE
Categories
All
Archives
September 2023
|


 RSS Feed
